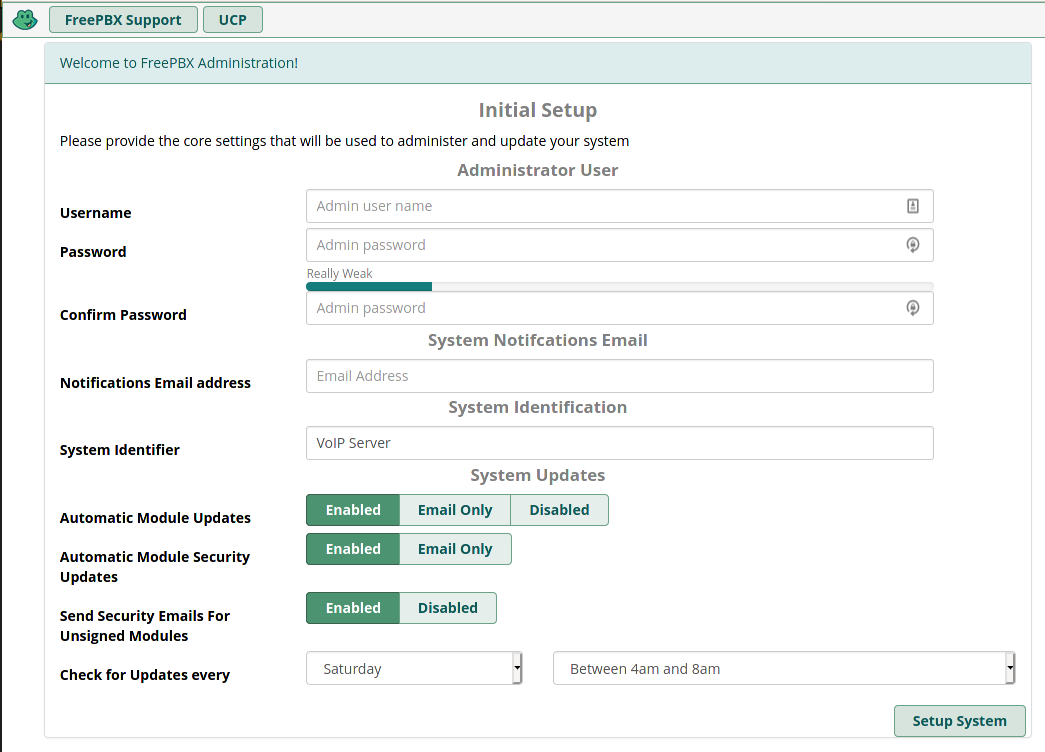
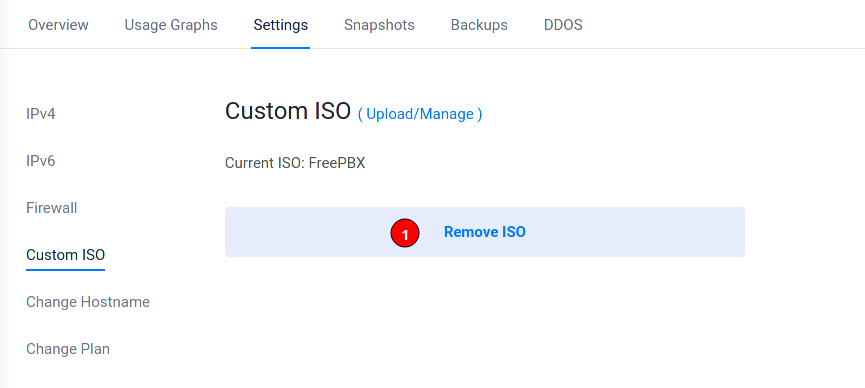
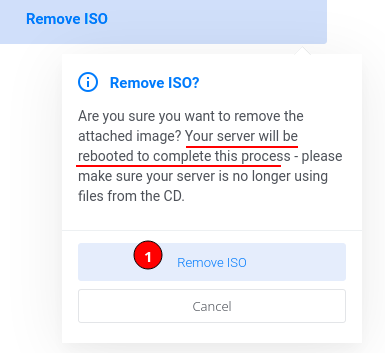
Creating a VM is an easy enough task that can be left to defaults a lot of the time. But if you want the best performance/options under Proxmox, you will have to go through a few minor hoops as Windows Server 2022 (or prior) does not have the drivers needed for everything built in.
-
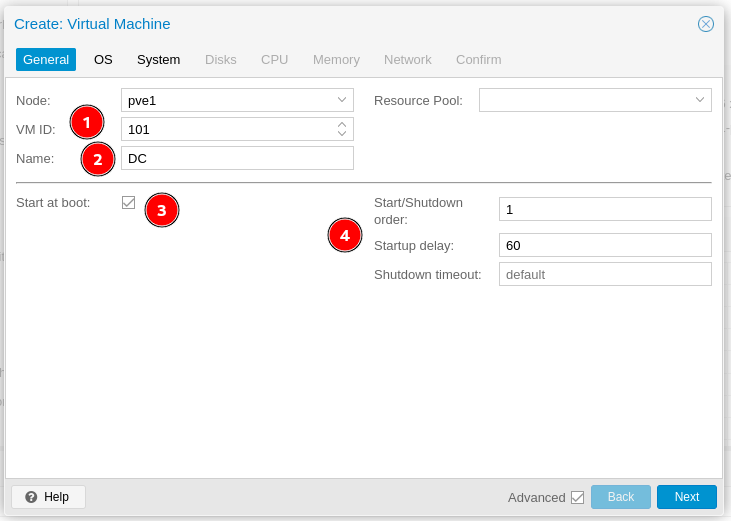
Click on Create VM to get the dialog box. First click on Advanced if it is not already checked.

-
Give the VM a name (2), ID (1), Start on boot (3), and order/delay (4) as desired. Then hit Next.
- Everything below the line is hidden if you have not checked Advanced.
- Everything below the line is hidden if you have not checked Advanced.
-
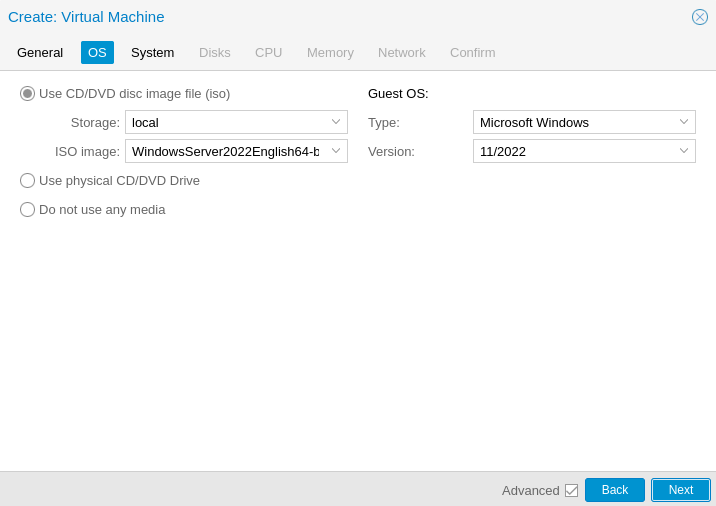
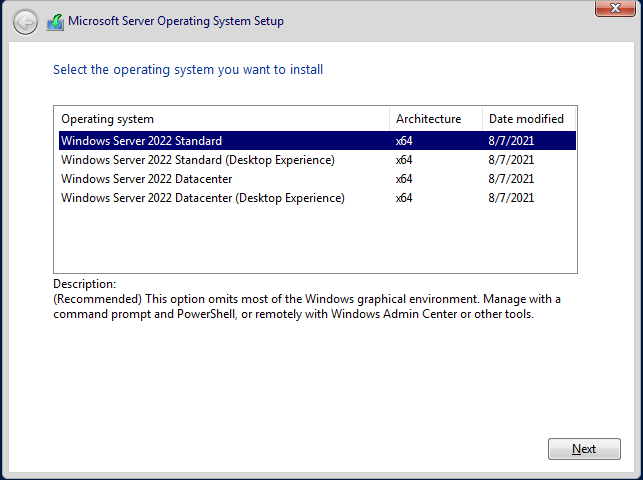
Choose your ISO and Guest OS Type, then hit next.
-
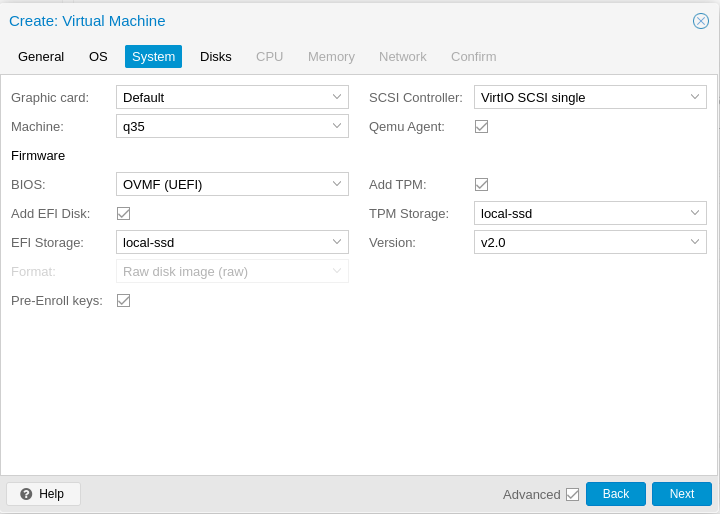
Since you specified a modern version of Windows, Proxmox automatically uses UEFI and you will need to specify EFI and TPM storage locations.
- I always keep them on the same disk that will house the boot storage.

- I always keep them on the same disk that will house the boot storage.
-
By default, it will use VirtIO for storage, you want this, but will have to add a driver during the Windows install itself. Also enable the Qemu Agent, again the guest agent will have to be installed after Windows setup completes.
-
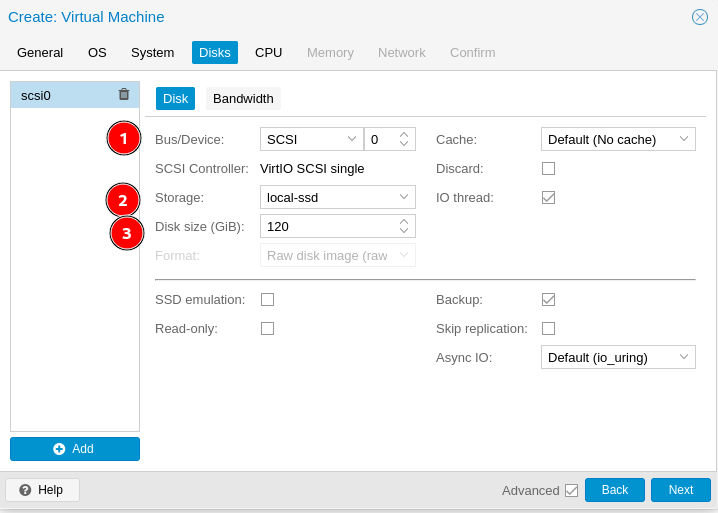
Change the default IDE disk to SCSI (1), set the storage location (2), and your desired disk size (3).
-
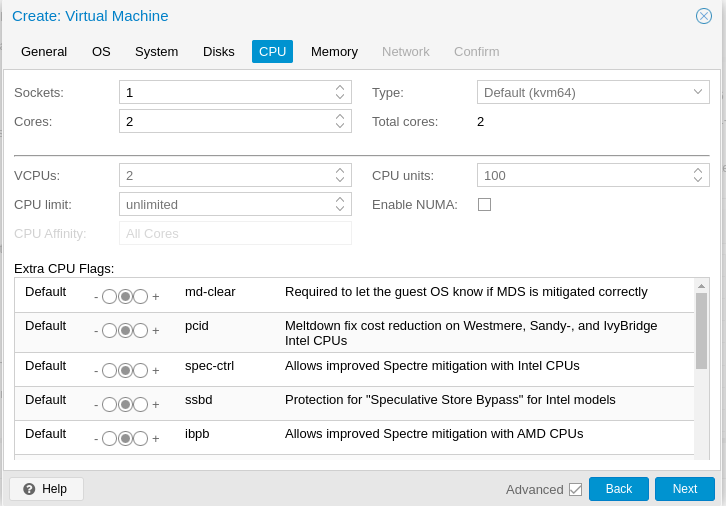
Assign the number of cores you need.
-
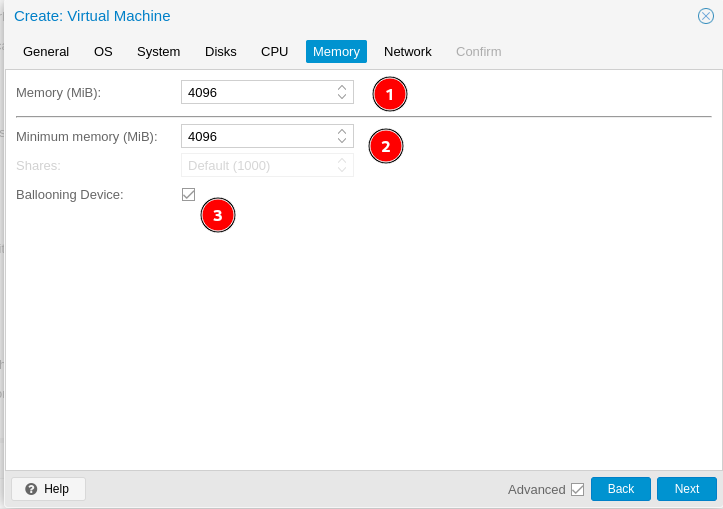
Set your max memory (1), minimum memory (2), and ensure Balooning device (3) remains checked.
-
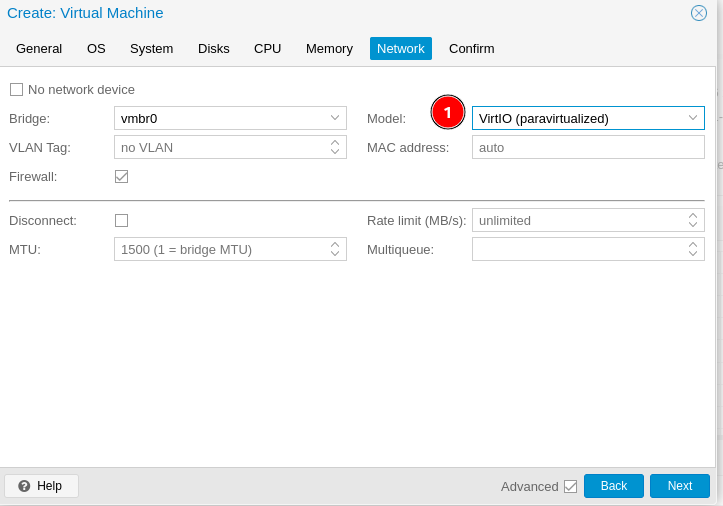
Change the network adapter model to VirtIO (1). You will not have a working network on boot up. The VirtIO drivers will need installed first.
-
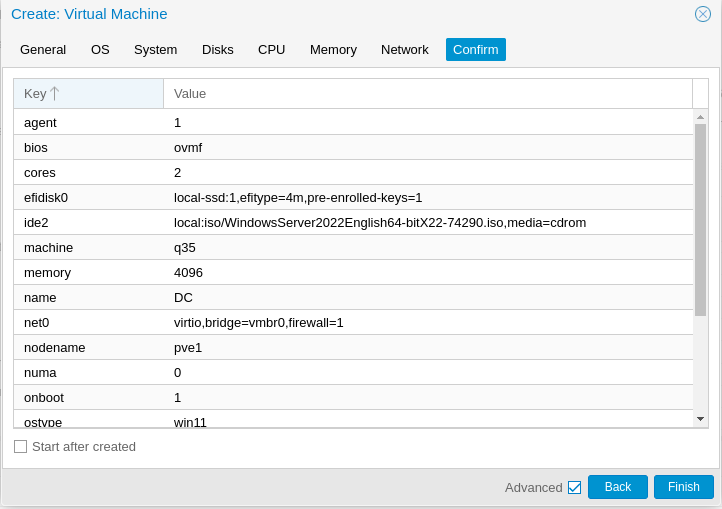
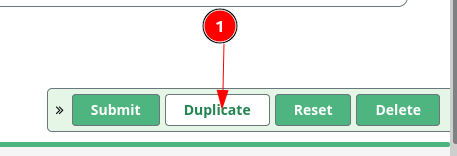
Review and hit finish. Do not check Start after created.
-
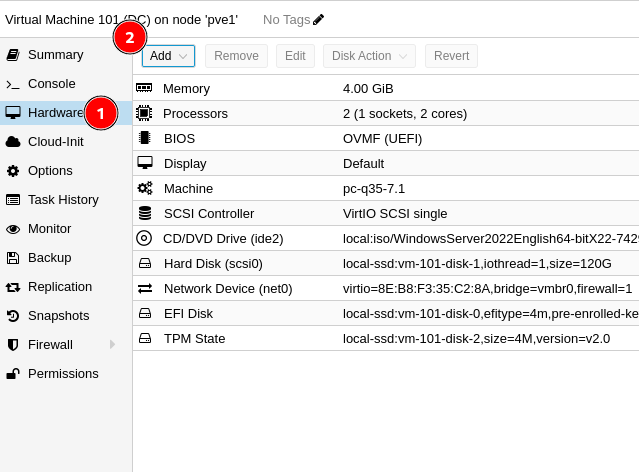
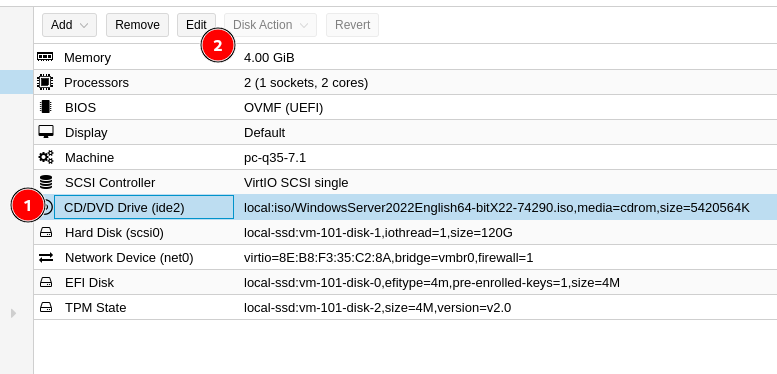
Select the VM and click on Hardware (1) and then Add (2)
-
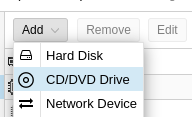
Choose CD/DVD
-
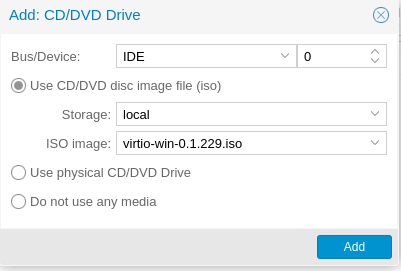
Add the virtio-win ISO, you will need this mounted to add the storage driver during install.
- Current stable ISO can be found here
- Current stable ISO can be found here
-
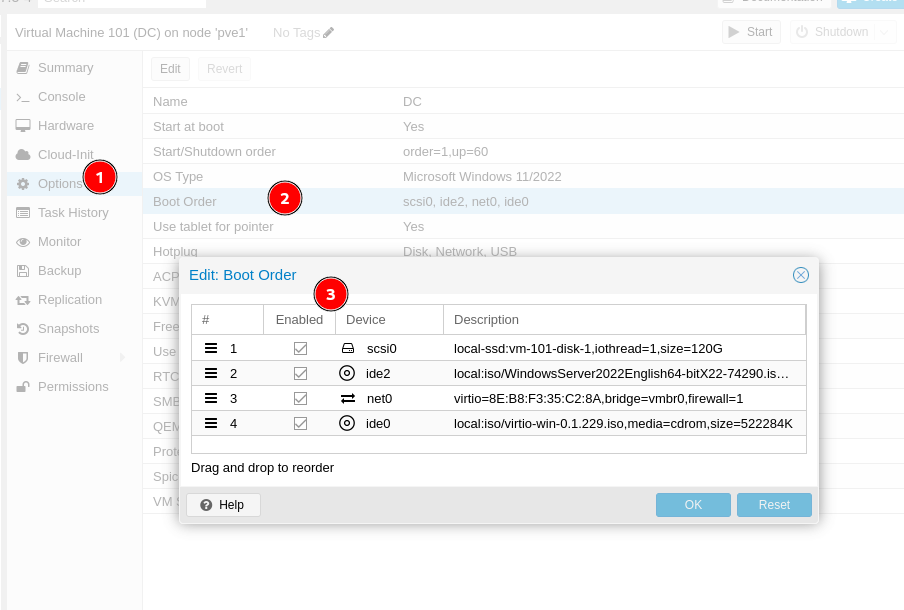
You can verify your boot order if you want, but it should still be correct.
-
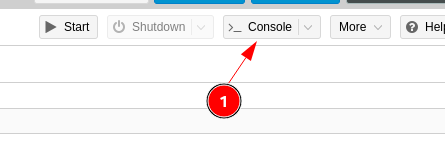
Open the Console
-
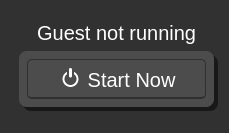
Click Start Now
-
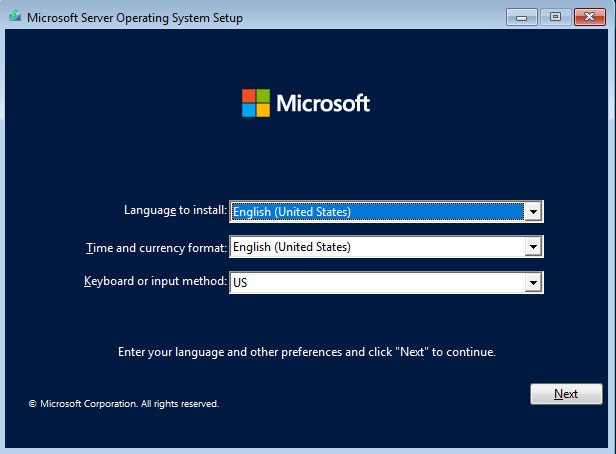
Click in the window and press a key, because Microsoft still thinks all of us are fucking stupid.

-
Set your options and hit Next.
-
Hit install now.

-
Choose your OS options and hit next.
-
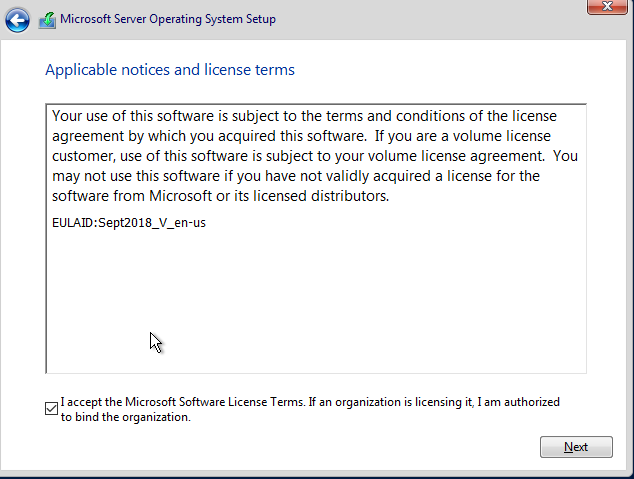
Accept the license and hit next.
-
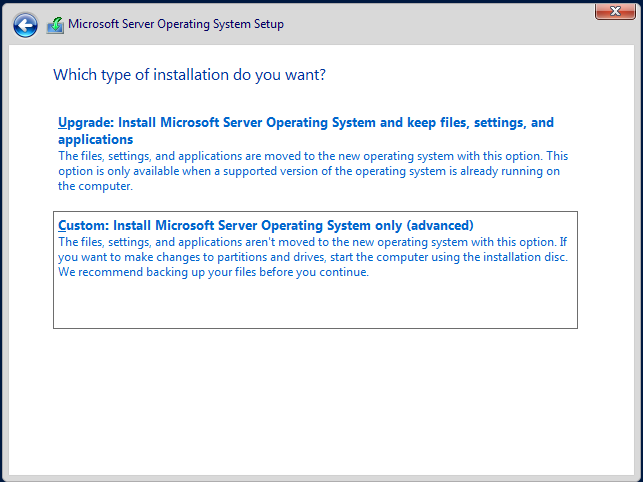
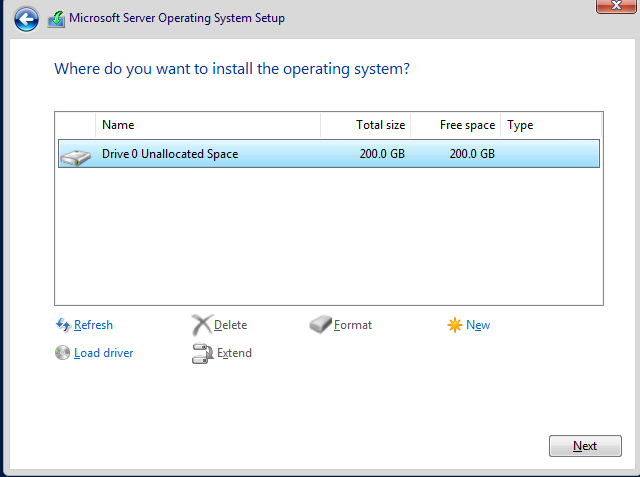
Choose Custom since Microsoft thinks a new install is an advanced task.
-
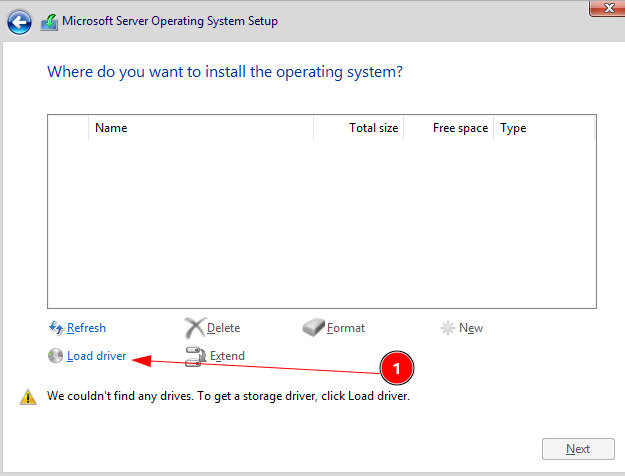
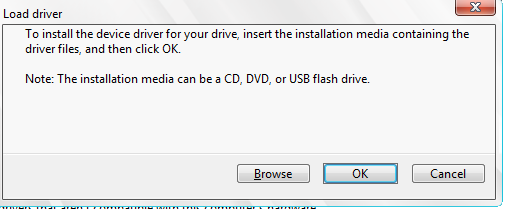
Finally, you can load the VirtIO driver (1)
-
Click Browse.
-
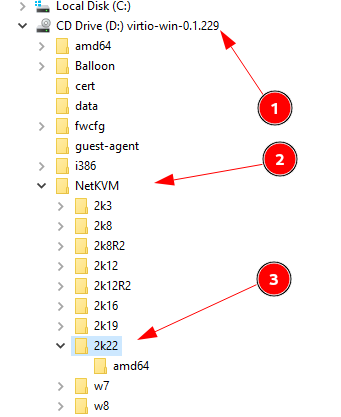
Expand the virtio CD Drive
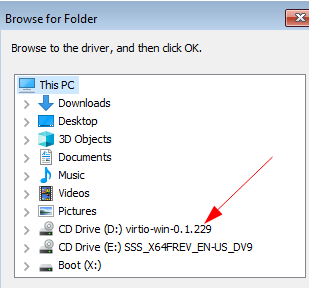
-
Expand amd64 folder (1), click on 2k22 (2), and click OK (3)
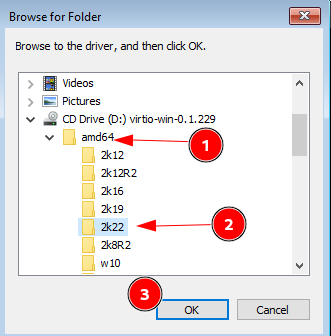
-
Click on Next and it will rescan for the disk, no need to click on rescan yourself.
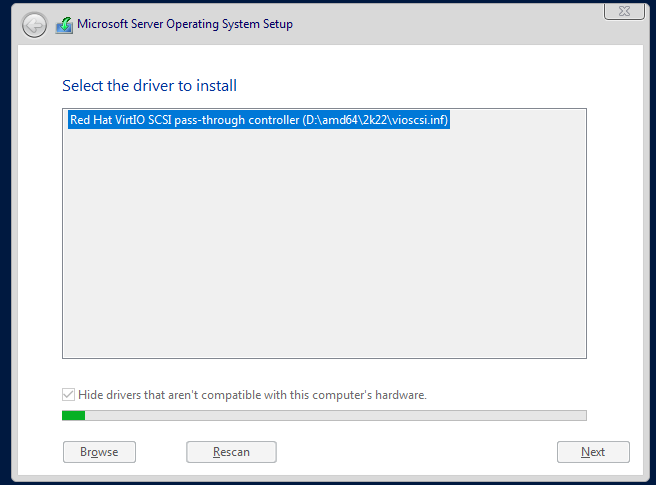
-
Now the disk is available, click next
-
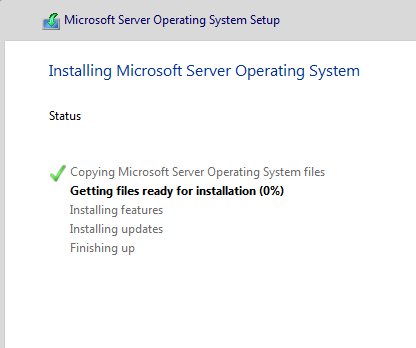
Windows will finish the install like normal and reboot.
-
wait for it..... It will reboot again

-
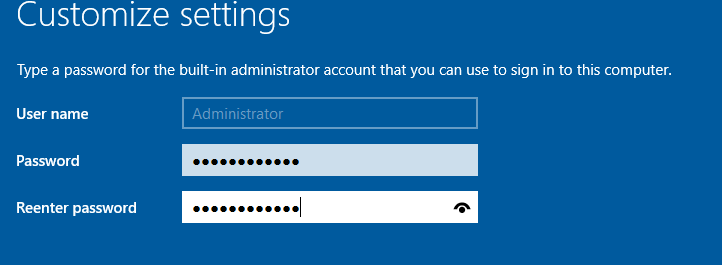
Create a password for the account you will delete anyway and click Finish. Because you don't leave Administrator do you?
-
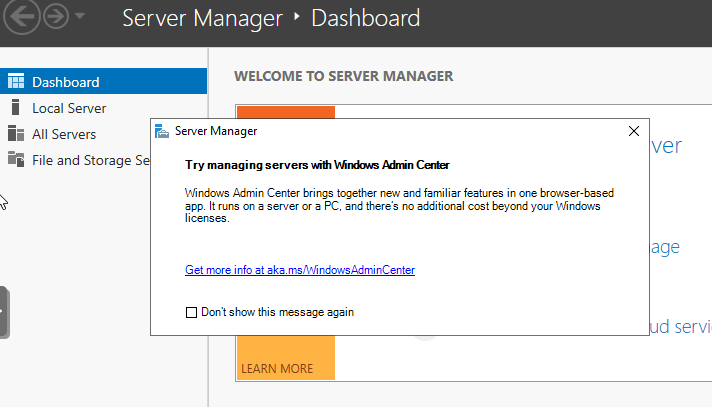
This example uses the Desktop Experience, so login and wait for the desktop. Close Server Manager and the WAC pop up.
-
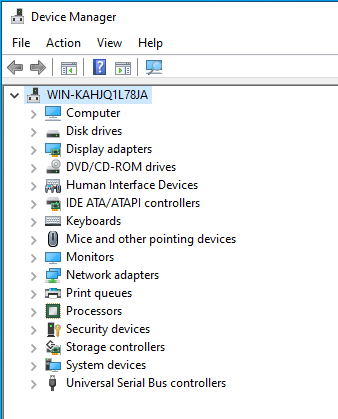
Open Device Manager
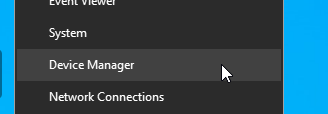
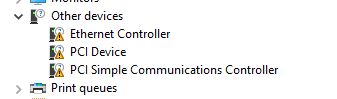
-
You will see three things to fix.
-
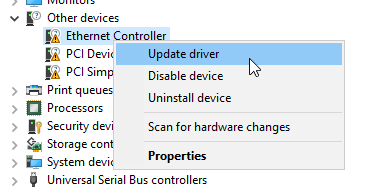
Right click and choose update driver for the Ethernet Controller.
-
Choose Browse
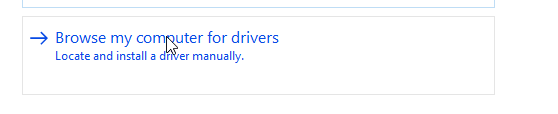
-
Browse again
-
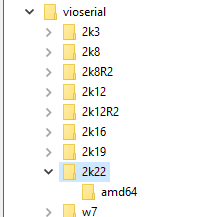
Expand the virtio ISO disk (1), expand netkvm (2), and select 2k22 (2), then click OK.
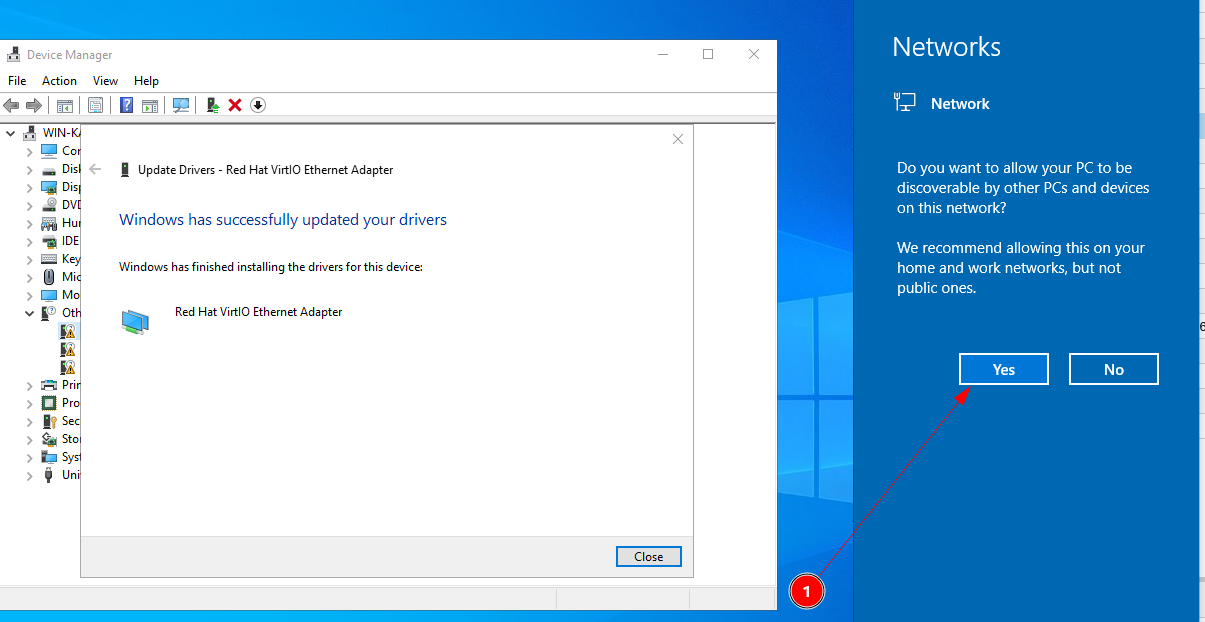
*Hit next and it will install the driver.

-
Before you hit close, you will want to hit yes on the Network discoverability screen for most use cases.
-
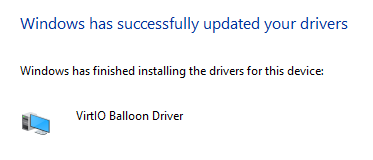
Repeat the process for the remaining two items.
- PCI Device is the Baloon folder
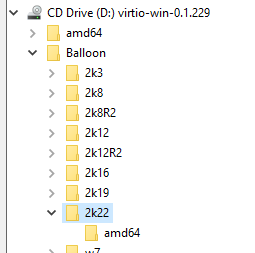
- PCI Simple Communications Controller is the vioserial folder
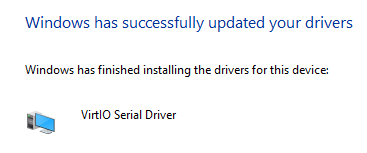
- PCI Device is the Baloon folder
-
Now you have all the drivers for the system devices.
-
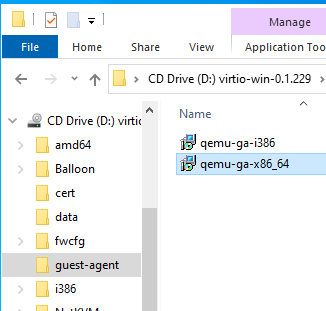
Finally, browse to the CD drive in Windows Explorer and install the guest agent
-
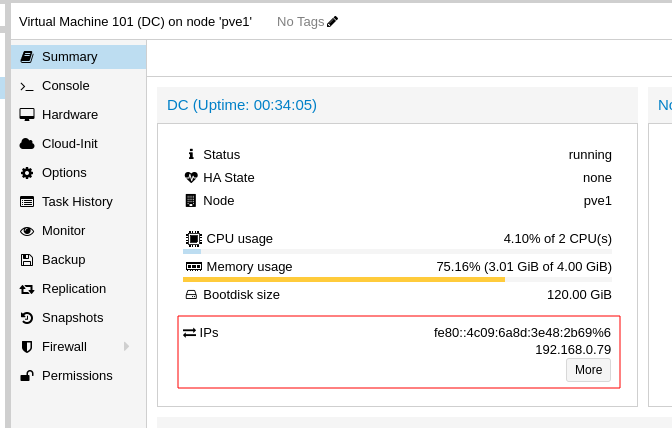
You will know the guest agent is properly installed is you see the IP addresses on the Proxmox Summary screen.
-
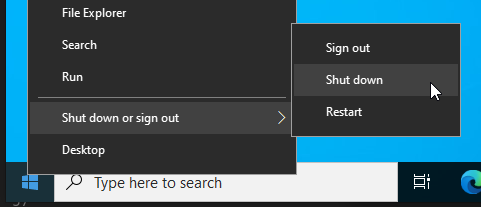
Shut down the VM
-
Remove the extra CD drive
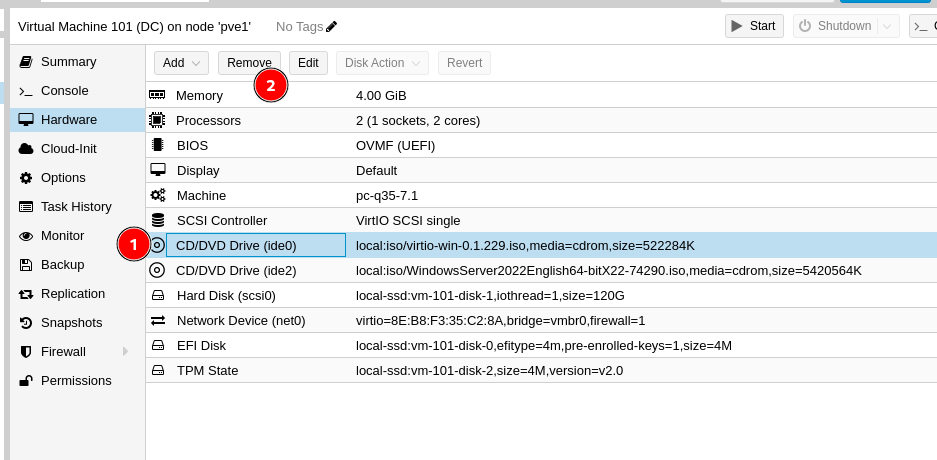
-
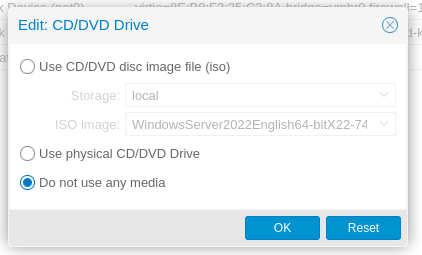
Unmount the Windows ISO.
-
Start the VM back up and setup the server for the task you installed it for
 to the right of the


 to the far right to edit the number